Connect and select
Connect the key and select the intended CW slice.
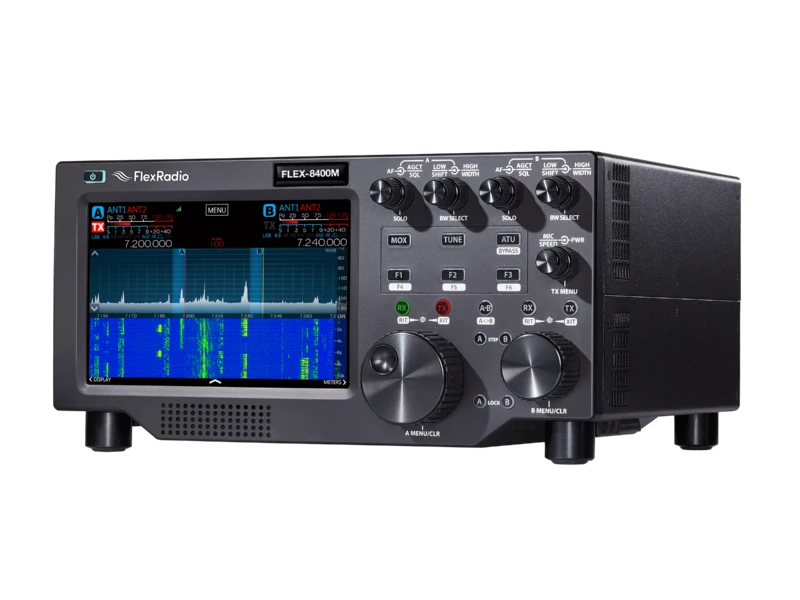
FLEX-8400 and the M version use the same radio family. This page follows SmartSDR for Windows, including when an M radio is connected to that client; the M front-panel workflow is covered by its hardware manual. The photo shows the M version.
SmartSDR for Windows guide Rev v4.1.6 (April 2026), checked with v4.2.20 release notes; FLEX-8000 Hardware Reference v1.0.20241126. Checked 2026-09-26; printed page numbers. Covers original firmware and the Windows client, including M radios connected to it. Standalone M, Maestro and third-party clients differ. Licenses and regional transmit limits vary. Back up profiles and read the release-specific upgrade instructions before changing versions.
Use this order as an operating checklist, not as a replacement for the radio manual. Controls and available options can vary by firmware and region.
Connect the key and select the intended CW slice.
Use a suitable dummy load and low power for the first key or macro test; check Local PTT and the TX slice.
Set IAMBIC, Speed, Sidetone and Pitch.
Tune the wanted slice and narrow its receive filter.
Check TX flag, antenna and power; send one short message and stop.
Search by setting or menu path. Manufacturer defaults and recommendations are labeled separately from CW599 advice; references identify the checked manual or software version.
Slice control > mode CW; TX flagCW599 note: Select CW on the intended slice, then verify its TX flag separately. In split operation, listening to slice A does not prove that slice A is the transmit frequency.
Settings > multiFLEX > Local PTT > EnableCW599 note: A key or footswitch connected to the radio follows the station designated Local PTT, which may differ from the window you are watching. Click Enable at the intended station and confirm its checkmark, then inspect that station’s TX slice. One connected station receives the assignment automatically; multi-client use depends on licensing and available resources.
CW transmit panel > IAMBIC; Radio Setup > Phone/CWCW599 note: Enable IAMBIC for a paddle and disable it for a straight key or external keyer. Select the familiar A/B response, then verify both contacts before transmitting. Use a TRS KEY plug: straight key between tip and sleeve, ring unconnected; paddle dot to tip, dash to ring and common to sleeve, with swap available in Phone/CW. First check each contact and release into a suitable dummy load at low power.
CW transmit panel > Speed; CWX speedCW599 note: Set a speed you can copy and rehearse a short message. CWX has its own speed control unless synchronization is configured; do not assume a typed macro matches your paddle setting.
Manual reference: SmartSDR User Guide v4.1.6, pp. 110, 134, 253–254
CW transmit panel > Sidetone / PitchCW599 note: Enable sidetone and use a modest headphone level. Confirm where audio is being monitored; network PC audio and local keying do not always provide the same sidetone path.
CW transmit panel > Breakin / DelayCW599 note: Breakin lets a key closure start RF; Delay controls return to receive, with zero selecting full QSK. Start with a finite delay and listen to recovery. The manual excludes QSK with an enabled internal ATU on a shared transmit/receive antenna; using ATU and QSK together requires a separately configured receive antenna port. The 8400 has one RX-A, so do not copy 8600 RX-B wiring. Breakin off is not a blanket inhibit for CWX or other PTT sources.
CW slice > receive filter presetsCW599 note: Center the wanted carrier in the audible slice, then narrow while comparing readability. The v4.2.20 notes describe the 1 and 3 kHz presets as pitch-aware; user-configurable receive presets require SmartSDR+. The notes tie the new defaults to a factory reset. Do not reset simply to make buttons match this list: export profiles and follow the manufacturer’s upgrade procedure.
Manual reference: SmartSDR User Guide v4.1.6, p. 131; v4.2.20 Release Notes, pp. 2–3
Active Slice > AUTOTUNECW599 note: One Shot scans once; Intermittent repeatedly follows the strongest in-passband signal every two seconds. Watch the frequency change and confirm by ear. A stronger neighbor can capture tuning: stop intermittent tracking, retune manually and narrow before retrying. The setting survives power cycles, so inspect it before use. It does not convert received Morse into text or guarantee selection of your intended station.
CWX > Live off > text > SendCW599 note: With Live off, review the full text before Send or Enter. Live sends as you type. Escape or a tap of the key stops sending; prove that stop action before a long macro.
CWX > Setup > F1–F12; Global profile SaveCW599 note: Store your callsign and a short exchange, then save the Global profile. Reload and inspect the messages before a contest; a profile change can also change the slice and transmit setup. A Global profile with no stored CWX messages leaves existing messages in place, so inspect them after every profile change.
No matching settings. Try a shorter search or clear the search and category.
These are original operator-oriented starting points. They are not factory presets and intentionally avoid claiming model-specific default values.
Check one change at a time.
Keep the wanted signal audible.
Leave a clear path back to receiving.
The checked documentation does not provide a built-in received-CW text workflow for FLEX-8400/M. CWX is a keyboard-to-CW transmitter. Receiving text requires separately configured software; it is not established by seeing text you typed in CWX. CW Auto Tune only adjusts tuning; it does not establish text-decoding support.
CWX Live is enabled. Turn it off for reviewed text followed by Send/Enter.
This guide explicitly uses the Windows client. Use the hardware manual for standalone M controls; the shown M photo identifies the hardware variant.
Use the manufacturer-controlled product and support pages to verify your region, firmware, menus, connector wiring, operating limits, and safety information. CW599 does not host, mirror, or reproduce the manual.
Search and filters run locally in your browser and do not connect to a radio. Version 1.0 (2026-09-26): bilingual guide and sourced product photo. Revisions are retained in site Git and release backups; no separate archived page.