Check the radio and key
Read MODEL, HW and SW in ABOUT. Connect the key to the rear KEY socket, select CW and choose the matching KEY MODE. Check the antenna and power supply before enabling any RF output.
The Q900 can display decoded CW as well as generate keying and send stored calls. Start with a clean received signal, learn what DECODE and THRESHOLD actually change, then prepare your own sending. The official product page now describes V4 hardware; the linked V2.1 manual is older, so check the controls and version shown on your own radio.
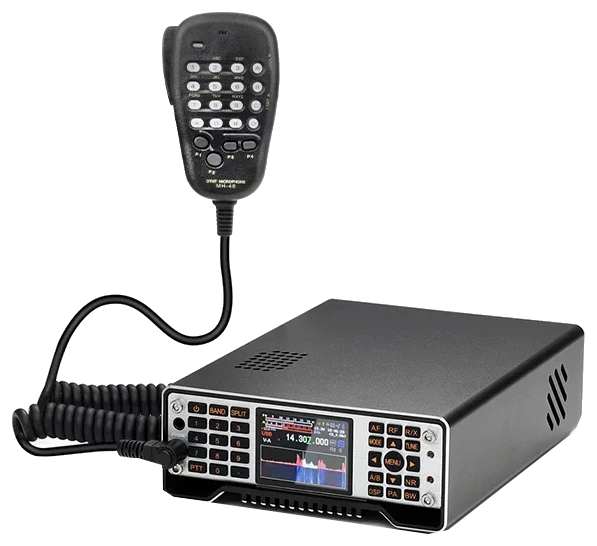
Checked 2026-09-09 against the English Q900 User Manual V2.1 (57 PDF pages; file metadata dated 2021-10-20) and the current official product/download pages. References use printed page numbers. The product page describes V4; older manual specifications and example values must not be treated as universal V4 defaults. Unclear sidetone/delay ranges are not asserted. Guide v1.0; document review, not a hardware test.
Use this order as an operating checklist, not as a replacement for the radio manual. Controls and available options can vary by firmware and region.
Read MODEL, HW and SW in ABOUT. Connect the key to the rear KEY socket, select CW and choose the matching KEY MODE. Check the antenna and power supply before enabling any RF output.
Hold BAND to open the CW settings and enable TRAINING. Adjust KEY SPEED and STF/STG; send separate dots and dashes and verify the radio does not indicate RF output.
Listen to one station first. Use BW to reduce adjacent interference only after tuning, then compare the wanted note before and after the change.
In the BAND CW settings, enable DECODE. Adjust THRESHOLD a little at a time and compare repeated characters with what you hear. The displayed text needs checking before it becomes a logged callsign.
Review A-CALL text, repeat count and interval. After listening for a clear frequency, disable TRAINING and test a short, appropriate low-power transmission. Verify the return to receive before repeated calling.
Yes. The official Q900 manual documents DECODE for received CW/RTTY text and a separate THRESHOLD adjustment. Treat it as a second opinion while listening: noise, fading, overlapping signals and uneven sending can still produce convincing-looking mistakes.
Select CW, tune the wanted station and keep its note clear. Use BW to reduce a neighbour only after tuning; changing a display setting cannot repair an unintelligible signal.
Hold BAND, select DECODE with up/down and change it with left/right. Return to reception and check for text while that station is sending. A-CALL and TRAINING are different controls.
Start from the displayed value, note it, and try small changes within 1–50. Compare repeated letters and the empty gaps between transmissions; restore the starting point if the result becomes worse.
Listen for the callsign and exchange again. If the screen and your ear disagree, request a repeat or leave the characters unresolved. Changing KEY SPEED adjusts your sending and is not a receive-decoder speed setting.
Check CW mode and DECODE first, then listen for a readable signal, widen BW if necessary and revisit THRESHOLD. If the control is absent, record HW/SW and compare the correct official firmware documentation.
Compare a quiet gap with real sending while making small THRESHOLD adjustments. Check RFG/IFG and nearby interference as well; do not assume that the maximum threshold is automatically best.
Retune, compare repeated transmissions and listen directly. A partly correct decode is not confirmation of every character; request the uncertain part again.
Search by control or menu path. References distinguish manufacturer manuals, distributor editions and firmware notes; documented defaults, source recommendations and CW599 advice are labeled separately.
CW: hold BAND > KEY MODE; up/down selects, left/right changesCW599 note: KEY accepts hand-key timing; AUTO-L and AUTO-R use the internal keyer with opposite paddle assignments. Choose KEY for an external keyer that already generates complete elements. With TRAINING enabled, test each contact separately and check the dot/dash order before sending words.
CW: hold BAND > KEY SPEEDCW599 note: This controls the internal keyer's sending speed. It does not set the speed of the received station or guarantee that DECODE will copy it. Send a familiar short word in TRAINING and reduce speed if the gaps between characters become rushed.
CW: hold BAND > STF or STGCW599 note: STF changes the note you hear while keying; STG changes its loudness. Use TRAINING to compare a few displayed settings without transmitting, and listen again after changing headphones. The manual's frequency-range notation is inconsistent, so this guide does not turn its example screen into a factory value or a verified frequency range.
CW: hold BAND > TRAININGCW599 note: TRAINING is the documented way to practise without RF transmission. It is separate from DECODE and does not mean that your own characters will be transcribed. Check for no transmit-power indication during practice; before an on-air contact, turn it off deliberately and recheck the frequency.
CW: hold BAND > TX-RXCW599 note: TX-RX determines how long the radio waits between finishing keying and returning to reception. If the first part of a reply is missed, try a shorter delay during a controlled test. Confirm actual receive recovery and any external amplifier timing; a low value alone does not prove full break-in operation.
Press MODE to select CW; hold MODE to change CW sidebandCW599 note: Changing CW sideband can help place nearby interference on the other side of the wanted note. Retune and compare by ear after switching. Check SPLIT and the displayed transmit frequency before keying; hearing a signal clearly is not proof that you will transmit on the intended frequency.
Press BW > adjust with left/right > press BW to finishCW599 note: BW changes the receive passband, which helps separate a wanted signal from a neighbour before you judge the decoder. The filter indicator is green while selected and returns to white when you finish. If the wanted note or complete characters disappear, widen the filter and retune before changing THRESHOLD.
Press RF > select RFG or IFG with left/right > change with up/downCW599 note: More gain can make both the wanted signal and noise louder. Use these controls when reception sounds overloaded or the decoder prints noise. Compare the same station before and after adjustment; keep the setting that makes complete characters clearer, then revisit the decoding threshold only if necessary.
CW: hold BAND > DECODECW599 note: DECODE enables the CW/RTTY text display; in CW mode it assists received Morse copy. It is independent of the automatic keyer and stored-call sender. Check that repeated parts of the transmission agree with your ear, especially callsigns and numbers, and leave uncertain text unconfirmed rather than guessing.
CW: hold BAND > THRESHOLDCW599 note: This adjusts the decoder's signal-detection threshold. It is not transmit power, keyer speed or the SWR protection threshold. After tuning, change one step at a time while listening to the same signal; compare both unwanted characters during gaps and missing characters during real sending. Restore the earlier value if either becomes worse.
Hold MENU > A-CALL > choose a KEY entry > press MENU to editCW599 note: Enter a short message with your own callsign using the radio keypad or a USB keyboard. The reviewed CW procedure uses KEY mode and a long press of the corresponding number to send. The older manual's menu list has an incomplete slot label, so verify the entries actually shown on your radio before assigning shortcuts.
Hold MENU > A-CALL > COUNT and DELYCW599 note: COUNT and the interval govern repeated transmission, not decoding. Confirm the message once before increasing the count, and leave enough quiet time to hear an answer. Some firmware may spell the interval DELAY. Check its displayed unit and observe a full send/listen cycle before using repeated calls.
Hold MENU > ABOUT; version information also appears under SETCW599 note: Use ABOUT when the pictured menu differs from your radio. The product page describes Q900 V4, while this linked manual predates that page and gives different general specifications. Match any update to the exact model, hardware and region on the official download page; compare the identifiers again after an authorized update.
Manual reference: User manual V2.1 pp. 15–16; official product and download pages
No matching settings. Try a shorter search or clear the search and category.
These are original operator-oriented starting points. They are not factory presets and intentionally avoid claiming model-specific default values.
A calm setup for learning the radio.
A patient workflow for signals close to noise.
For operators who need quicker station turnaround.
The radio's documented DECODE function displays received CW itself. A computer may provide separate audio-decoding or logging software, but it is not required for this built-in display. USB keyboard sending and A-CALL are separate functions.
TRAINING deliberately prevents transmission. Check that setting, the KEY MODE, and the station's transmit indication before changing anything else. Turn practice mode off only when the antenna, operating frequency and transmit setup are ready.
Do not assume so. The official site now describes V4, while its downloadable V2.1 manual contains older general specifications. Use this guide's cited CW controls as a starting point, compare your HW/SW and screen labels, and choose updates for the exact hardware and region.
Open the official download page and choose the English V2.1 manual for this model. The manufacturer protects direct PDF downloads, so use its page if a saved PDF address fails. Match firmware to your hardware and region. CW599 does not host or reproduce the manual.
Search and filters run locally in your browser and do not connect to or control the radio. Version 1.0 (2026-09-09): bilingual CW guide, decoder workflow, real product cutout and source references. Revisions are retained in site Git and deployment backups; no separate archived page is available.