Check the complete station
Confirm the controller/RF-deck connection and antenna. Match Key Type to the device at ELEC-KEY; do not assume a connector on another Icom model is equivalent.
Build a repeatable CW station around the controller and RF deck. Start with the correct key connector, confirm the intended transmit side, and add dual watch, APF and contest memories only after basic keying works.
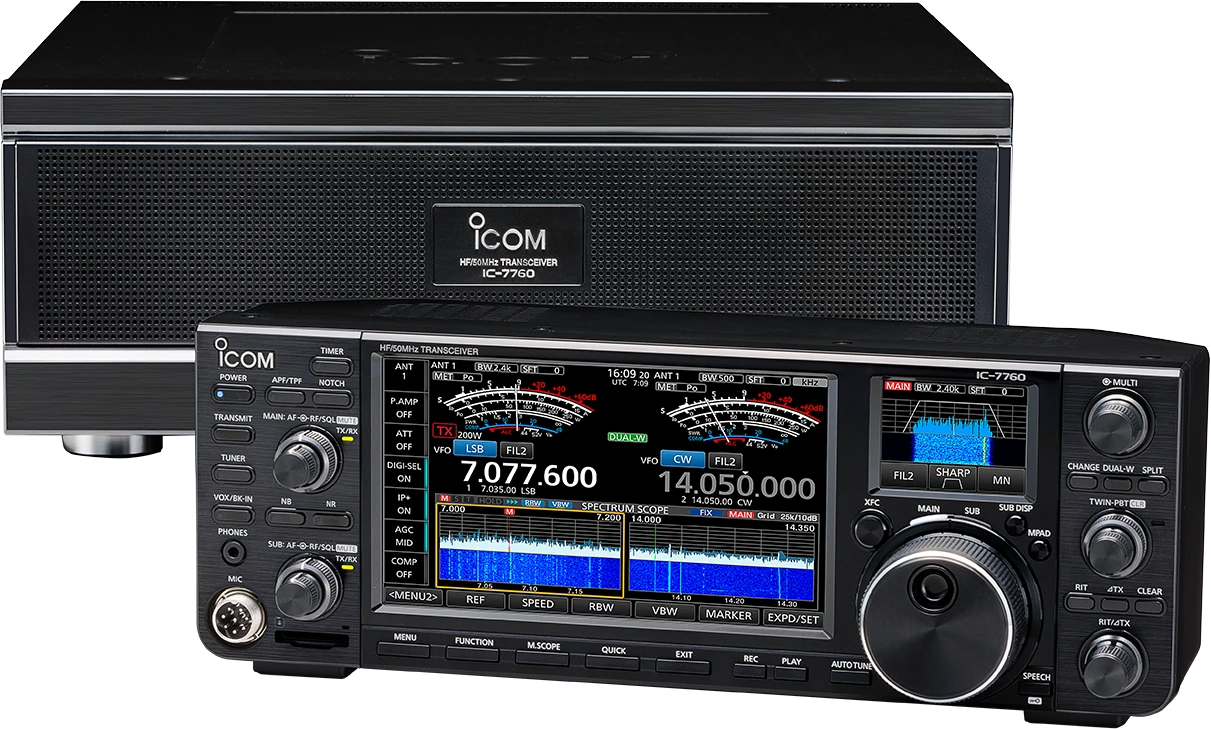
Checked 2026-09-06: English Basic 5 (100 PDF pages), Advanced 1 (124 PDF pages), as served by Icom UK. References use printed page numbers. Basic-manual factory defaults are for the USA version; verify your region and firmware. Guide v1.1; documentary review, not a hardware or network test.
Use this order as an operating checklist, not as a replacement for the radio manual. Controls and available options can vary by firmware and region.
Confirm the controller/RF-deck connection and antenna. Match Key Type to the device at ELEC-KEY; do not assume a connector on another Icom model is equivalent.
Choose CW on the intended band. Check MAIN/SUB and SPLIT before keying; hearing a station on one receiver does not prove you will transmit there.
Use MULTI for KEY SPEED and CW PITCH. With break-in off and the radio in standby, test dots, dashes and side tone.
Start with BKIN after listening for a clear frequency. Test the station at appropriate low power and verify the external equipment returns cleanly to receive.
Tune first, compare APF widths, then review memory text and serial triggers. Recheck the active side before each split-frequency exchange.
Search the model-specific CW controls below. Menu labels and ranges are drawn from official documentation; the notes are original CW599 operating guidance.
MENU > SET > CW-KEY Set > Key TypeCW599 note: This setting applies to ELEC-KEY on the controller. Use Straight for an external electronic keyer. Confirm the exact connector in the manual and test each element in standby before connecting the rest of the keying chain.
CW: MULTI > KEY SPEEDCW599 note: Rotate MULTI and listen to the result with break-in off. Increase speed only when your character spacing remains deliberate; this setting does not change an external keyer’s timing.
CW: MULTI > CW PITCHCW599 note: Choose a note that remains comfortable through a long session. Compare it with the received signal before tightening a filter; the pitch control does not move the operating frequency.
MENU > SET > CW-KEY Set > Side Tone LevelCW599 note: Adjust sidetone separately from key speed and pitch. Practise only in standby with break-in off, then check the level again when changing headphones.
MENU > SET > CW-KEY Set > Paddle PolarityCW599 note: Reverse the assignment only if the physical sides are opposite to your habit. Test each paddle independently before sending a callsign.
MENU > SET > CW-KEY Set > Dot/Dash RatioCW599 note: Keep standard weighting while assessing your spacing. Adjust only after listening to a recording, not to compensate for a poor network connection or inconsistent hand timing.
CW: VOX/BK-IN; hold 1 s, rotate MULTI for delayCW599 note: BKIN waits after key-up; F-BKIN returns to receive between elements. Check the on-screen indication and actual receive recovery. A fast radio does not guarantee that an external amplifier is ready for QSK.
MENU > SET > CW-KEY Set > Rise TimeCW599 note: Envelope shaping and break-in delay solve different problems. Keep the default shape while proving the amplifier and relay timing; evaluate a change by the transmitted signal.
CW: APF/TPF; hold 1 s for APF menuCW599 note: Select the intended receiver and tune the note before applying APF. Compare widths at similar loudness. If the signal seems to disappear, widen the filter or switch APF off and retune.
MENU > KEYER > EDIT/SET > EDITCW599 note: Use your own callsign and review the whole message in standby. A one-second hold repeats a memory; touch the same key again to stop. Confirm the transmit side before calling a split-frequency DX station.
MENU > KEYER > EDIT/SET > 001 SETCW599 note: Review the asterisk serial placeholder and the memories that trigger counting. Compare the current number with the log; use the minus-one control if a repeated exchange advanced it accidentally.
MENU > SET > Connectors > USB SEND/Keying > USB Keying (CW)CW599 note: Match the program’s COM port and control line to the radio setting. Prove computer keying with RF inhibited before enabling the transmit chain; avoid conflicting SEND and keying assignments.
No matching settings. Try a shorter search or clear the search and category.
These are original operator-oriented starting points. They are not factory presets and intentionally avoid claiming model-specific default values.
A calm setup for learning the radio.
A patient workflow for signals close to noise.
For operators who need quicker station turnaround.
In standby with break-in off this is expected and useful for practice. Before enabling BKIN, confirm the selected transmit band, antenna, key type and external equipment. Do not compensate by raising power.
Confirm which side is selected before changing a filter or tuning. Dual reception, the main tuning target and the split transmit frequency are separate choices.
The controller and RF deck must maintain their connection. If audio or keying becomes intermittent, stop transmitting and check the link and official setup guidance. Do not treat network delay as a reason to shorten amplifier switching times.
Use the manufacturer-controlled product and support pages to verify your region, firmware, menus, connector wiring, operating limits, and safety information. CW599 does not host, mirror, or reproduce the manual.
Setting search and filters run in your browser and do not connect to or control your radio. Version 1.1 (2026-09-07) adds official transparent product images and language-specific resource labels; 1.0 introduced the bilingual guide. revisions are retained in site Git and deployment backups, with no separate archived guide page yet.