Connect and select
Connect the correct key adapter and select CW/CWR.
TX-500 uses a compact field layout; the base transceiver has no built-in tuner. Receive text, TX echo and recorded messages are separate functions.
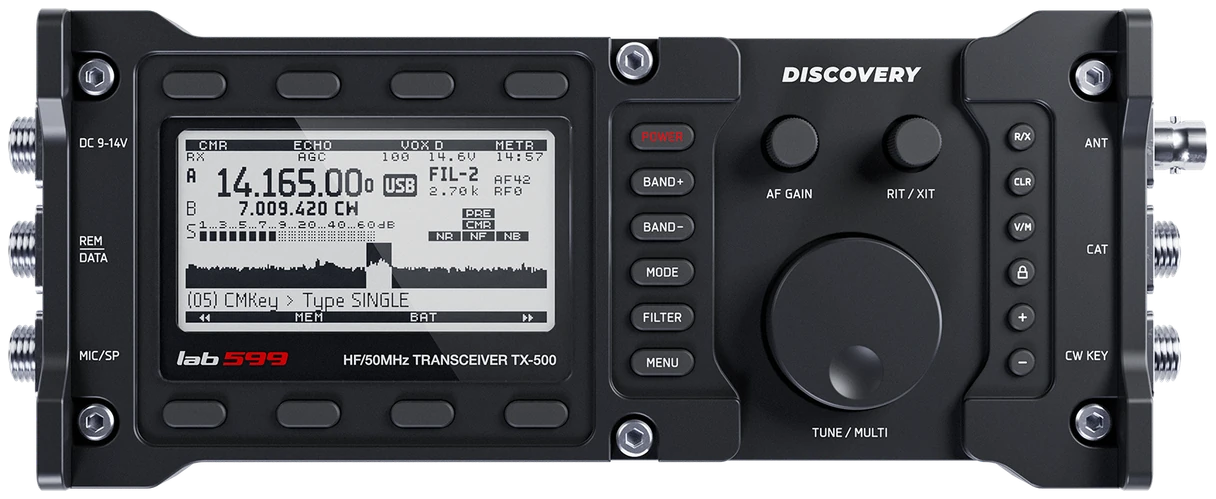
English TX-500 manual FW v1.2, August 2026; changelog checked through v1.30.00. Names take precedence over old menu numbers. Checked 2026-10-07; original firmware; printed manual pages unless marked PDF.
Use this order as an operating checklist, not as a replacement for the radio manual. Controls and available options can vary by firmware and region.
Connect the correct key adapter and select CW/CWR.
Enable MON, disable VOX and check the key without RF.
Set CW KEY, CW SPEED and CW PITCH.
Match the tone indicator and enable decoder RX if desired.
Check antenna and power, enable CW VOX and send once.
The radio has separate RX and TX CW text switches. Menu wording varies between manual and firmware revisions; use CW DECOD/CW DECODE by name.
Open the CW decoder menu, choose RX with SubMenu and set ENABLE.
Tune until the CW tone-match indicator agrees with your CW PITCH.
Use an appropriate receive filter and moderate gain; compare audibility before and after narrowing.
Return to the main display and compare decoded text with the heard callsign; TX text is a separate option.
Return to the receive-decode setting above, confirm a steady audible CW signal and retune before changing more parameters. Transmit echo alone does not confirm receive decoding.
Listen to one complete call and compare it with the display. Fading and irregular spacing can defeat the decoder; request a repeat and copy by ear instead of completing an uncertain callsign from guesses.
Center the wanted signal first, then narrow the receive filter gradually. If the wanted tone disappears, widen the filter and tune again. Stop adjusting when a clear tone and stable text agree.
Search by setting or menu path. Manufacturer defaults and recommendations are labeled separately from CW599 advice; references identify the checked manual or software version.
MENU > CW KEY > TYPE / AUTO / REVCW599 note: Use SINGLE for direct keying or AUTO for a paddle. Verify the connector adapter and each contact with MON on and VOX off before an expedition.
MENU > CW SPEEDCW599 note: Read the unit shown by the radio and send a known short phrase. Do not treat characters per minute as words per minute; verify the actual cadence by ear before storing a message.
MENU > CW PITCHCW599 note: Choose a comfortable pitch, then tune the incoming signal until the CW tone-match indicator agrees. This is the essential first check when receive text is blank or unstable.
MON on; VOX offCW599 note: Enable MON and disable VOX before key practice. Confirm no RF output and keep PTT released; switch VOX on only after checking the band, antenna and output power.
MENU > VOX DELAY > CWCW599 note: Use the CW subsetting, not MIC or DIG. Increase delay if switching between elements is distracting; confirm reception returns promptly enough to hear the other station’s break.
MENU > CW WEIGHTCW599 note: Start with the documented ratio and make a short timing check. Irregular character gaps should be corrected at the paddle before experimenting with dash length.
MENU > CW DECOD / CW DECODE > RXCW599 note: Select RX with the SubMenu key, then ENABLE. Return to the main screen to see characters in the lower line. TX enable alone displays your sending and cannot decode the correspondent.
Hold CWM1/2 to record; hold CWS1/2 for textCW599 note: Record or enter a short CQ, check the callsign and play once before using a beacon. Text playback follows the keyer-speed setting; prove the stop key while still testing.
Lab599 > DownloadsCW599 note: TX-500 decoder support first appeared as beta in v1.13.08; v1.26.06 reorganized menus. Match names, not an old item number, and use the correct model package instead of transferring firmware between TX-500 and MP.
No matching settings. Try a shorter search or clear the search and category.
These are original operator-oriented starting points. They are not factory presets and intentionally avoid claiming model-specific default values.
Check one change at a time.
Keep the wanted signal audible.
Leave a clear path back to receiving.
TX is your own text. Set decoder RX to ENABLE for received CW.
Firmware reorganized menus. Match the model and the named setting in its current documentation.
No. TX-500 uses CWM/CWS labels in the checked manual; MP uses MAG/CWST. Follow the labels on your firmware.
Use the manufacturer-controlled product and support pages to verify your region, firmware, menus, connector wiring, operating limits, and safety information. CW599 does not host, mirror, or reproduce the manual.
Search and filters run locally in your browser and do not connect to a radio. Version 1.0 (2026-10-07): four-language guide and sourced product photo. Revisions are retained in site Git and release backups; no separate archived page.