Read both firmware versions
Check SYSTEM INFO and record APP and BASE. The newer KEY decoder arrived in 1.0.6; 1.0.8 also changes CW speed accuracy and message calling.
The X6200 has built-in CW decoding, but its controls have changed with firmware. This guide starts with the version check, explains the newer KEY-menu decoder and keeps receive decoding separate from the keyer and outgoing message macros. Match every instruction to the firmware actually installed.
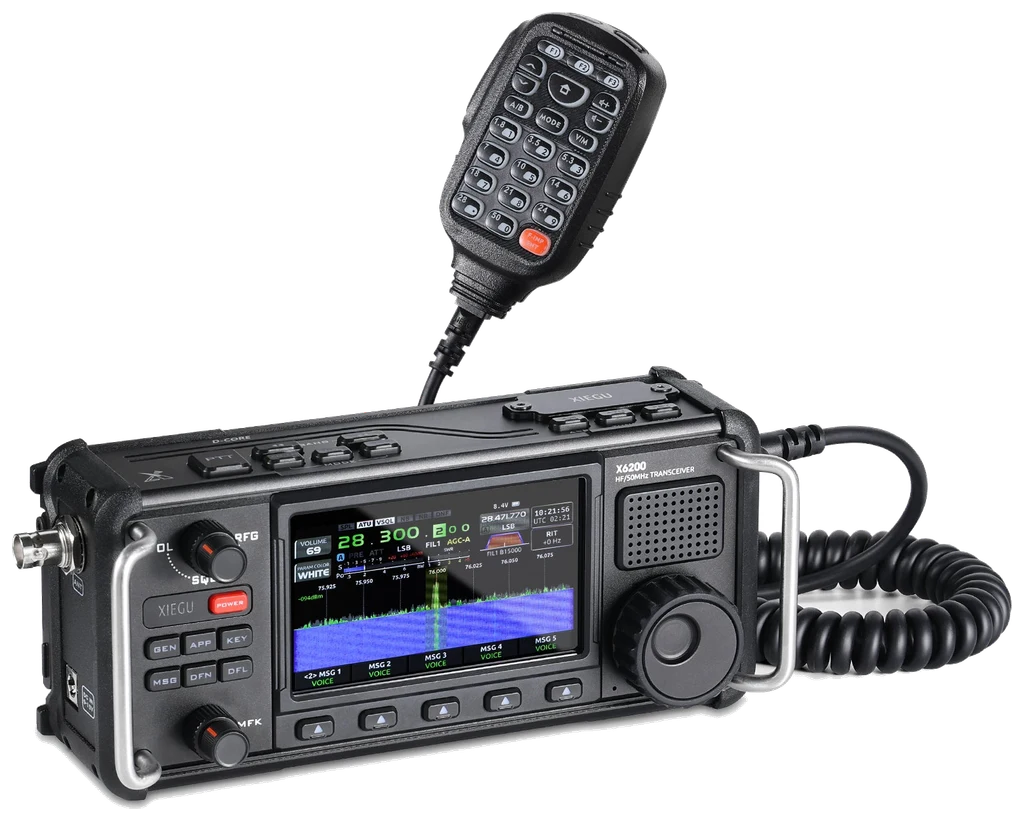
Checked 2026-09-09: Xiegu English Rev05 manual (Radioddity download dated 2024-09-25; 55 PDF pages), 1.0.3/1.0.6 notes, 1.0.7 notes, and 1.0.8 notes published 2026-08-29 (APP build 2026-08-17, BASE build 2026-08-19). References use printed pages. Menus are explicitly versioned; unverified ranges/defaults are not presented as facts. Check regional firmware compatibility. Guide v1.0; document verification, not a hardware test.
Use this order as an operating checklist, not as a replacement for the radio manual. Controls and available options can vary by firmware and region.
Check SYSTEM INFO and record APP and BASE. The newer KEY decoder arrived in 1.0.6; 1.0.8 also changes CW speed accuracy and message calling.
Connect to KEY with power off. Select CW, match KEY TYPE and enable CW TRAINER for the initial sidetone check.
Set a comfortable tone and speed. Tune the wanted station by ear, then adjust DFL without removing its note.
On 1.0.6 and later, open KEY page 2 and enable CW DECODER in CW mode. Adjust its threshold while watching fresh received text.
With a suitable antenna and a clear frequency, verify power, trainer state and saved callsign before transmitting. On 1.0.8, use APP > F3 CALL for CW macros.
Yes: X6200 already had a CW MODEM decoder in its early firmware. Version 1.0.6 added the newer KEY-menu decoder. The workflow below uses that newer interface; decoding reads incoming signals, whereas the keyer and macros produce outgoing Morse. Firmware 1.0.7 removed CW from APP > MODEM; use KEY for that version and later.
Read APP and BASE in SYSTEM INFO. For the new decoder, use firmware 1.0.6 or later and start in CW mode as specified in its release notes.
Find one signal by ear and keep it inside DFL. A decoder threshold cannot recover a tone removed by the receive filter.
Press KEY again for page 2 and enable CW DECODER. New text should appear below the waterfall.
Use the MFK outer ring for the 1–50 threshold. The release notes suggest 5–14 for low noise or 15–30 for high noise; compare fresh text with your ear and ask for repeats when needed.
Check APP and BASE first. Older documentation uses APP > MODEM; choose instructions for that version or follow the official upgrade procedure.
First confirm tuning and DFL. Then increase threshold cautiously for noise or reduce it for missing weak elements, checking one change at a time.
The 1.0.7 release notes include a fix for this symptom. Turn decoding off to compare, record the installed version and consult current firmware instructions rather than changing every audio setting.
Source reference: X6200 Rev05 p. 31; FW 1.0.6 (2025-01-15), 1.0.7 (2025-10-12) release notes
Search by control or menu path. References distinguish manufacturer manuals, distributor editions and firmware notes; documented defaults, source recommendations and CW599 advice are labeled separately.
GEN > SYSTEM / SYSTEM INFOCW599 note: The 2024 Rev05 manual predates the new decoder controls. A missing KEY decoder may indicate older firmware rather than a fault. Use the manufacturer's or distributor's complete upgrade instructions; do not mix files for different radios.
Manual reference: X6200 Rev05 p. 40; FW 1.0.6 notes (2025-01-15)
Right-side KEY; KEY page 1 > KEY TYPECW599 note: A paddle needs internal keyer timing; an external keyer supplies its own timing. Check the manual's plug wiring, then test each contact with the trainer enabled before making an on-air transmission.
KEY page 1 > KEY SPEEDCW599 note: Firmware 1.0.8 corrects actual keying speed that did not match the selected WPM. Recheck a familiar word after updating. A stored WPM number alone is not evidence of unchanged timing across versions.
Manual reference: X6200 Rev05 p. 35; FW 1.0.8 notes (2026-08-29)
KEY page 1 > IAMBICCW599 note: Early firmware also received automatic-keyer timing fixes. If squeezing gives an unwanted element, check your mode and firmware before changing your technique. Test both independent paddle contacts before a squeeze.
Manual reference: X6200 Rev05 p. 35; FW 1.0.3 notes (2024-10-14)
KEY page 1 > TONE / TONE LEVELCW599 note: Avoid turning the level up repeatedly when no sidetone is heard. The 1.0.3 notes fixed a fault above level 63 on earlier firmware. Check the version and headphones, then confirm sidetone in trainer mode.
Manual reference: X6200 Rev05 p. 35; FW 1.0.3 notes (2024-10-14)
KEY page 2 > CW TRAINER / QSK TIMECW599 note: Verify that practice produces sidetone without RF. Turn the trainer off only for an intended transmission and check receive recovery after key-up. An external amplifier's timing requirements still apply.
KEY page 2 > DI/DA RATIOCW599 note: Do not use a ratio change to disguise a firmware speed problem or rushed character spacing. Compare a recording after any change and return to the previous setting if letters become harder to distinguish.
Manual reference: X6200 Rev05 p. 35; FW 1.0.8 notes (2026-08-29)
DFL > FILTER1–3; press MFK to select edge; turn outer ringCW599 note: Keep both edges around the wanted note. If the receiver becomes silent, widen or restore the current filter first. Check the audible result before using decoder threshold to compensate for a missing signal.
Firmware 1.0.6+: CW > KEY page 2 > CW DECODERCW599 note: This is the newer decoder, not the first decoding feature the radio ever had. Early versions used APP > MODEM. The 1.0.6 instructions specify CW mode; begin there when verifying the newer controls.
Manual reference: X6200 Rev05 p. 31; FW 1.0.6 notes (2025-01-15)
Firmware 1.0.6+: KEY page 2 > CW Decoding Threshold; MFK outer ringCW599 note: These are tuning suggestions, not factory defaults. Increase cautiously if noise causes extra characters; reduce if weak elements vanish. Change one step at a time while comparing a repeated callsign by ear.
Rev05: MSG / MODEM; firmware 1.0.8: CW or CWR > APP > F3 CALLCW599 note: The current CALL route is documented in the 1.0.8 release notes; do not assume every 2024 screen still looks the same. Review message content and arrange one short test before relying on automatic calling in the field.
Manual reference: X6200 Rev05 pp. 32, 36; FW 1.0.8 notes (2026-08-29)
Right-side DEV USB port; logging software setupCW599 note: The manual describes computer CW sending, but this does not establish an export stream for the built-in decoder's text. Confirm the software's selected port, mode and keying action before connecting an active transmit chain.
No matching settings. Try a shorter search or clear the search and category.
These are original operator-oriented starting points. They are not factory presets and intentionally avoid claiming model-specific default values.
A calm setup for learning the radio.
A patient workflow for signals close to noise.
For operators who need quicker station turnaround.
No. The early MODEM already decoded CW. Version 1.0.6 introduced the newer decoder in KEY page 2 while retaining the old route. Version 1.0.7 removed CW from MODEM; use KEY on that firmware and later.
Firmware 1.0.8 restores CW macros at APP > F3 CALL in CW/CWR. The 2024 Rev05 manual predates that route. Check the version before deciding that a missing old menu is a hardware problem.
Treat it as a clue. Noise, nearby stations, fading and uneven sending can produce convincing wrong letters. Confirm repeated text by ear or request another transmission before logging.
Check hardware, region and firmware against the manufacturer and the clearly identified distributor resources. Manual languages are stated in the links. This page provides original operating explanations and does not host or reproduce manuals.
Search and filters run locally in your browser and do not connect to or control the radio. Version 1.0 (2026-09-09): bilingual CW guide, decoder workflow, real product cutout and source references. Revisions are retained in site Git and deployment backups; no separate archived page is available.