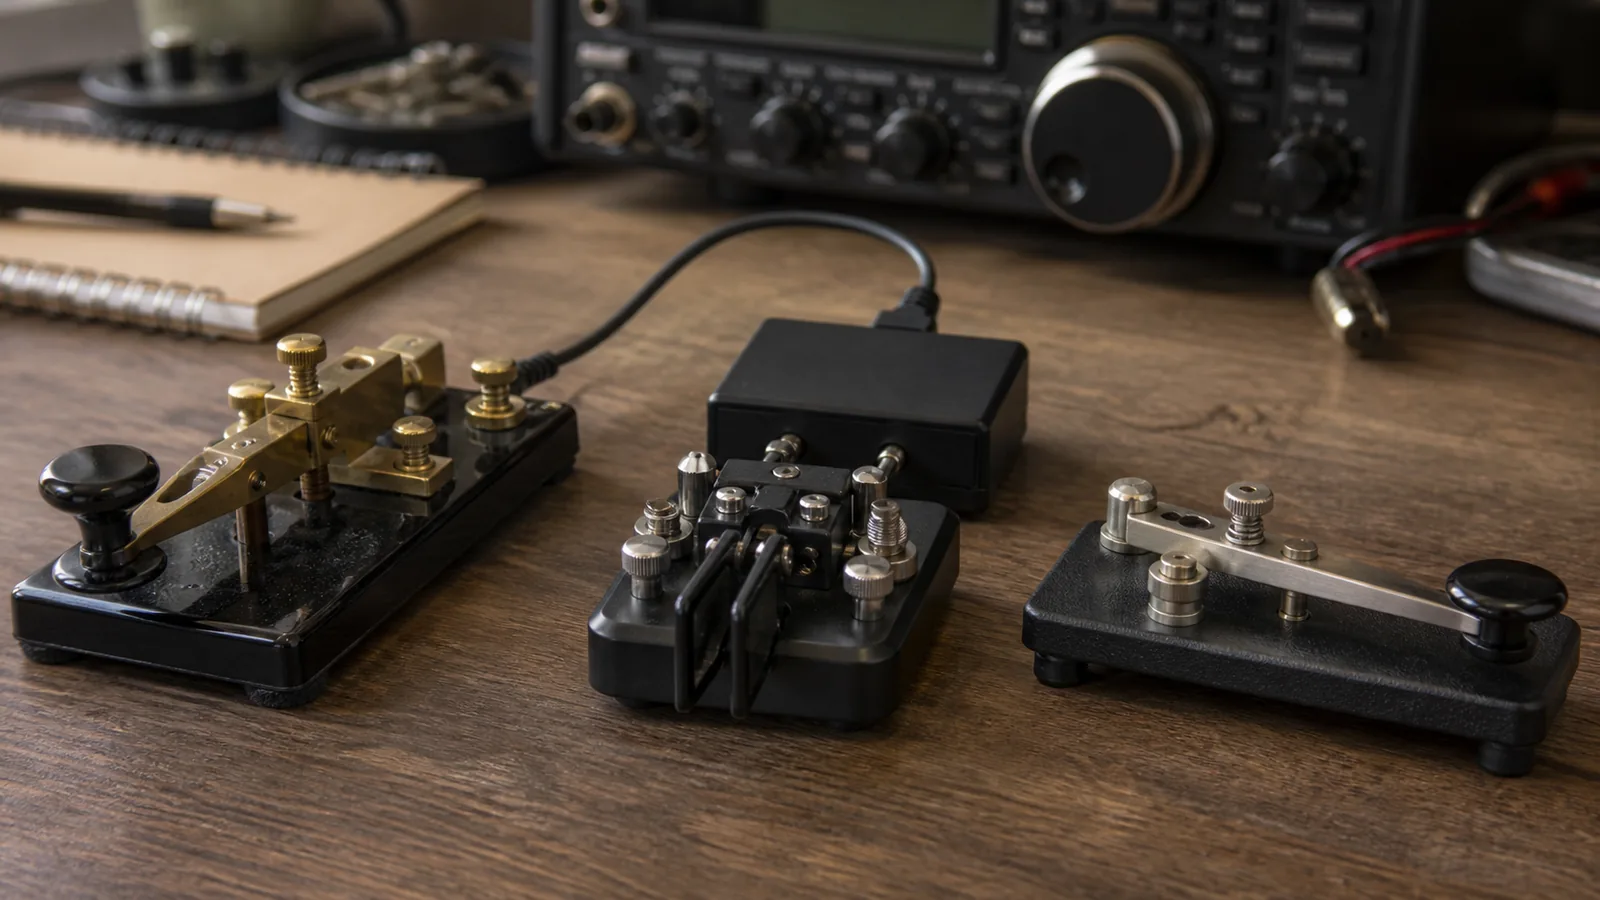
Choosing a first CW key is easier when you stop looking for the one “correct” key. A straight key, a paddle connected to an electronic keyer, and a sideswiper all let you put real Morse code on the air. They differ mainly in hand motion, who controls element timing, and the kind of practice that feels satisfying.
This is not a speed ranking. A careful operator can send pleasant code with any of these tools, and a new operator can make uneven code with any of them. The useful question is: which mechanism helps you build a relaxed, understandable fist for the QSOs you want to have?
ARRL’s CW Mode overview lists both straight keys and paddles among the familiar CW tools. The Straight Key Century Club also treats the straight key and the side-to-side sideswiper (or cootie) as distinct manual key types. A paddle is different because it normally works with an electronic keyer.
The short answer
Choose a straight key if you want to learn deliberate element timing with a simple up-and-down motion. Choose a paddle and electronic keyer if you want the keyer to make consistent dits and dahs while you concentrate on spacing and rhythm. Choose a sideswiper if the hand-made, side-to-side style appeals to you and you are happy to time every element yourself.
None of these choices prevents you from learning the others later. In fact, a short session on a different key can reveal a tension or spacing habit you did not notice on your usual one.
What changes from key to key
| Key type | Main hand motion | Who times dits and dahs? | Typical connection |
|---|---|---|---|
| Straight key | Press and release vertically | You | Straight-key input, or a keyer/transceiver set for straight-key mode |
| Paddle | Move one or two levers sideways | Electronic keyer | Paddle/keyer input with separate dit and dah contacts |
| Sideswiper (cootie) | Push one lever left and right | You | A mechanical-key or suitable key input; check the radio/keyer manual |
The table is a starting point, not a wiring diagram. Transceivers and external keyers do not all label inputs the same way. Before transmitting, read the manual and test into a dummy load or receive your own sidetone. Never assume that a paddle connector is interchangeable with a straight-key connector.
Straight key: direct timing in a vertical motion
With a straight key, closing the contact starts an element and releasing it ends the element. Your hand therefore controls the length of every dit and dah, the gaps inside a character, and the spaces between characters and words. The mechanism is simple; the skill is in making those decisions consistently.
That directness is why many beginners find a straight key educational. It makes uneven element lengths immediately audible. Try a short drill such as PARIS PARIS at an unhurried speed. Record your sidetone, then listen for three separate things: equal dits, dahs about three dit lengths, and clean spaces. If one part is rough, slow down before changing equipment.
A straight key is also a natural fit for the historical and social side of CW. It remains welcome in activities such as ARRL Straight Key Night and SKCC operating. But it is not only a nostalgia device: a well-adjusted key and a loose hand can produce a clear conversational QSO.
The trade-off is fatigue risk when you push a vertical motion too hard or too long. Do not grip the knob tightly, lock the wrist, or chase a speed that makes the code blur. Change posture, take breaks, and keep the key from sliding. Persistent hand or arm pain is a reason to stop and rethink the setup, not to “train through” it.
Paddle: the keyer shares the timing work
A paddle has separate contacts for dits and dahs. In common use, an electronic keyer makes the element lengths: hold the dit lever and it repeats dits; hold the dah lever and it repeats dahs. The operator still controls when a character begins and ends, which elements are requested, and the spacing between characters and words.
That division of work can make the first on-air experience less intimidating. Set a comfortable keyer speed, use a short practice word, and listen for whether your letters are separated cleanly. The keyer can make a perfectly proportioned dit while you can still run words together; a paddle is not an automatic cure for rhythm.
Single-lever and dual-lever paddles are both valid. A dual-lever paddle can be used one side at a time just like a single-lever paddle. With an iambic-capable keyer, pressing both levers can alternate dits and dahs. CWops explains that this “squeeze” technique is optional, not a requirement for owning a dual-lever paddle, in Iambic Keying—Debunking the Myth.
For a beginner, start with one lever at a time. Learn to send a small set of letters cleanly before experimenting with squeeze patterns or a particular keyer mode. You do not need iambic technique to make good CW, and you should not buy a new radio merely to obtain it.
Sideswiper: manual timing with a lateral rhythm
A sideswiper, often called a cootie, has one lever that you move left and right to close alternate contacts. Every dit and dah is still made manually. The alternating motion can feel very different from pressing a straight key, and it can create an individual, rhythmic “fist.”
The CWops edition of *The Art and Skill of Radio-Telegraphy* describes sideswiper sending as alternating left-right or right-left movements. SKCC explicitly includes sideswipers/cooties alongside straight keys and bugs in its manual-key activities. Those sources are useful reminders that a sideswiper is a real operating instrument, not a novelty prop.
Because timing remains manual, start slowly. A useful first drill is to send short alternating-pattern letters such as A, N, R, and K, then stop and listen. Do not force a left-right alternation where it makes a character awkward; clarity matters more than a decorative rhythm. As with any manual key, adjust the contact spacing and spring/tension only a little at a time, following the maker’s instructions.
Choose by your next three months, not your imagined final speed
Use this decision guide:
- You are learning basic element timing and have access to a straight-key input: start with a straight key at relaxed speed.
- You already copy code comfortably but sending timing distracts you from the QSO: try a paddle and keyer, one lever at a time.
- You enjoy manual sending and want a lateral, personal style: borrow or build a sideswiper and use it slowly for a few practice sessions.
- Your hand becomes tense, numb, or painful: pause; improve height, support, key stability, and workload before choosing a different mechanism.
- You are buying blind: do not make the decision from a photo. Ask a local club member if you can send a few minutes on their key, ideally with your normal chair and desk height.
Speed is only one consideration. The operator who sends 15 WPM with even spacing, comfortable posture, and calm repeats is easier to work than the operator who sends faster code that is tiring or crowded.
A fair comparison drill
If you can borrow two or three key types, make the comparison controlled. Use the same sidetone pitch, a comfortable listening level, and a modest speed. Send the same short text for two minutes on each key. Record the audio if possible. Then ask:
- Which key made your hand tense first?
- On which key did word spaces disappear?
- Could you send
CQ CQ DE YOURCALLthree times without correcting yourself? - Did you enjoy the motion enough to practice again tomorrow?
The last question matters. Consistent, pleasant practice will improve your sending more than a theoretically ideal mechanism that remains in a drawer.
To rehearse a normal contact after choosing a key, use the CW599 QSO Simulator. For a focused check on whether your characters and spacing are recognizable, the CW599 Morse Translator is useful alongside your sidetone recording. These tools do not replace listening to real operators, but they make short, repeatable practice sessions easy to set up.
The best first key is the one you can send clearly and comfortably
Straight keys teach direct timing. Paddles let an electronic keyer make repeatable elements. Sideswipers keep timing manual but change the motion and feel. Each can support a good CW QSO when it is adjusted safely, used at a sensible speed, and paired with patient listening.
Start with the key available to you, practice short sessions, and judge the result by clarity and comfort. The next key can be an experiment, not a verdict on your ability.