Connect and select
Confirm the assembled band configuration and key wiring.
QMX and QMX+ share the operating manual; physical layouts and band configurations differ. This guide starts after construction and alignment. Check current kit stock and assembled-unit lead times on the manufacturer status page.
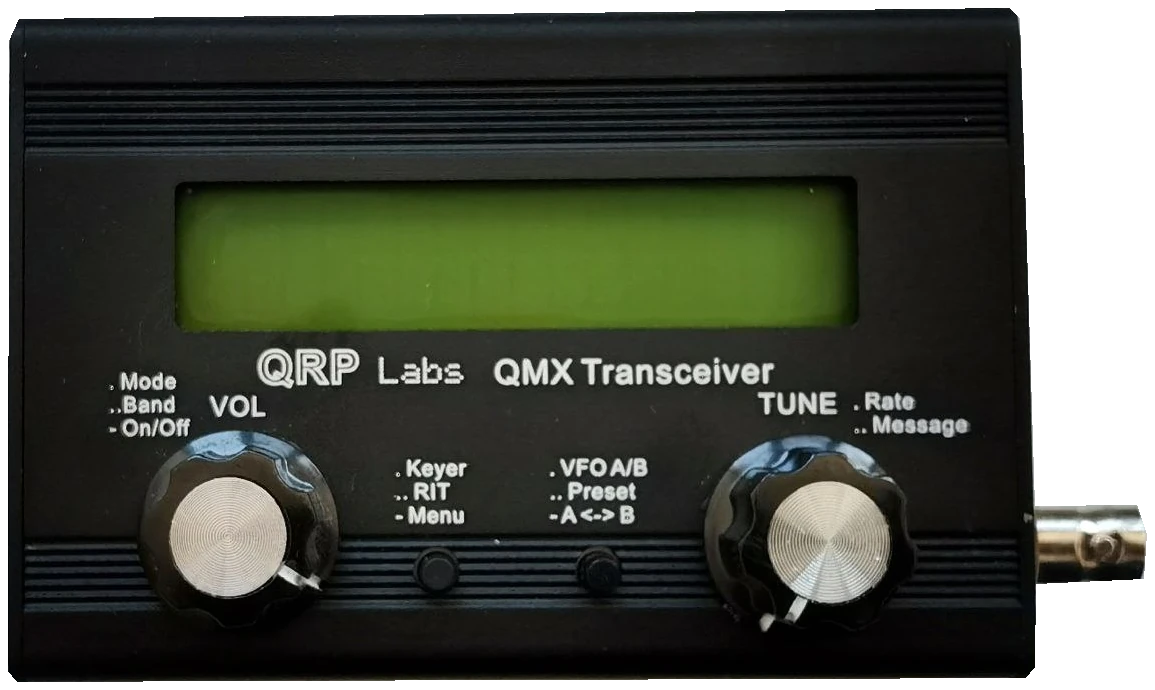
English QMX Operating Manual firmware 1_04_004; standard hardware and firmware, not unofficial derivatives. Checked 2026-10-07; original firmware; printed manual pages unless marked PDF.
Use this order as an operating checklist, not as a replacement for the radio manual. Controls and available options can vary by firmware and region.
Confirm the assembled band configuration and key wiring.
Enable Practice and look for P beside the frequency.
Choose keyer mode and verify speed and clean spacing.
Tune to the audio center, then enable received text if desired.
Check antenna and power, disable Practice and send a short call.
Received text, transmitted text and CW menu editing have independent switches. Tune the audio first; the decoder’s averaging controls are for difficult conditions, not a compulsory setup ritual.
Open CW > CW Decoder > Enable Rx and enable it.
Use a compatible CW filter center on QMX; preserve the approximately 700 Hz hardware-filter alignment on QCX.
Listen to one complete call and compare the lower-line text. Enable Tx alone cannot provide incoming text.
Keep baseline averaging values until tuning is correct. Change only one value and restore it if the text gets worse.
Return to the receive-decode setting above, confirm a steady audible CW signal and retune before changing more parameters. Transmit echo alone does not confirm receive decoding.
Listen to one complete call and compare it with the display. Fading and irregular spacing can defeat the decoder; request a repeat and copy by ear instead of completing an uncertain callsign from guesses.
Center the wanted signal first, then narrow the receive filter gradually. If the wanted tone disappears, widen the filter and tune again. Stop adjusting when a clear tone and stable text agree.
Source reference: QMX Operating Manual 1_04_004, pp. 25–33, 53
Search by setting or menu path. Manufacturer defaults and recommendations are labeled separately from CW599 advice; references identify the checked manual or software version.
CW > CW Keyer > Keyer modeCW599 note: Select the physical key you connected and test separate elements in Practice mode. Choose a familiar iambic response before adjusting weight or automatic spacing.
Manual reference: QMX Operating Manual 1_04_004, pp. 25–33, 53
Tap Select > turn TUNE > tap SelectCW599 note: Adjust while in Practice and listen to the character spacing. The new speed also affects stored-message playback; check a short message before transmitting.
CW > CW Keyer > Keyer swapCW599 note: Use swap when the dot and dash directions are reversed. Test a single press on each side and an alternating sequence before storing any message.
Manual reference: QMX Operating Manual 1_04_004, pp. 25–33, 53
CW > CW Keyer > Practice modeCW599 note: Enable Practice and confirm P beside the frequency. The keyer and text display still work, allowing you to test spacing without putting a practice message on the antenna.
Manual reference: QMX Operating Manual 1_04_004, pp. 25–33, 53
CW > CW Keyer > Keyer WeightCW599 note: 500 represents 50.0% dot duty cycle. Keep it while checking your spacing; weight changes element and gap durations together, so it is not a substitute for adjusting WPM.
Manual reference: QMX Operating Manual 1_04_004, pp. 25–33, 53
CW > CW Keyer > Semi QSKCW599 note: OFF selects full QSK; Auto uses a speed-related receive delay. Compare listening comfort with your own keying before selecting faster recovery.
Manual reference: QMX Operating Manual 1_04_004, pp. 25–33, 53
CW > CW Filters > CW passbandCW599 note: Not every bandwidth offers every center frequency; select a compatible pair and retune after a change. Narrowest is only useful when the wanted signal remains inside it.
Manual reference: QMX Operating Manual 1_04_004, pp. 25–33, 53
CW > CW Decoder > Enable RxCW599 note: Enable Rx controls incoming text on the lower line; Enable Tx controls your sending. If no text appears, confirm Rx first, then tune the signal before experimenting with averaging controls.
Manual reference: QMX Operating Manual 1_04_004, pp. 25–33, 53
CW > CW Decoder > Noise blnk. / Speed avg. / Ampl. Avg.CW599 note: Change one parameter and compare the same signal. Excessive blanking can remove short dots, while slow averaging can miss the start of a new caller; return to the recorded baseline if readability worsens.
Manual reference: QMX Operating Manual 1_04_004, pp. 25–33, 53
Messages > 1–12 / Interval / RepeatsCW599 note: Edit with TUNE/Select or the enabled CW edit decoder. Verify the callsign in Practice and use a finite repeat count before unattended-looking repetitive CQ.
Manual reference: QMX Operating Manual 1_04_004, pp. 25–33, 53
No matching settings. Try a shorter search or clear the search and category.
These are original operator-oriented starting points. They are not factory presets and intentionally avoid claiming model-specific default values.
Check one change at a time.
Keep the wanted signal audible.
Leave a clear path back to receiving.
Practice blocks RF and shows P. Confirm the station before disabling it.
No. QMX has configurable DSP passbands; QCX uses an analogue CW filter with a fixed center.
Enable Tx and Enable Rx are separate. Confirm Rx, tune to the filter center and reduce adjacent interference before changing timing averages.
Use the manufacturer-controlled product and support pages to verify your region, firmware, menus, connector wiring, operating limits, and safety information. CW599 does not host, mirror, or reproduce the manual.
Search and filters run locally in your browser and do not connect to a radio. Version 1.0 (2026-10-07): four-language guide and sourced product photo. Revisions are retained in site Git and release backups; no separate archived page.